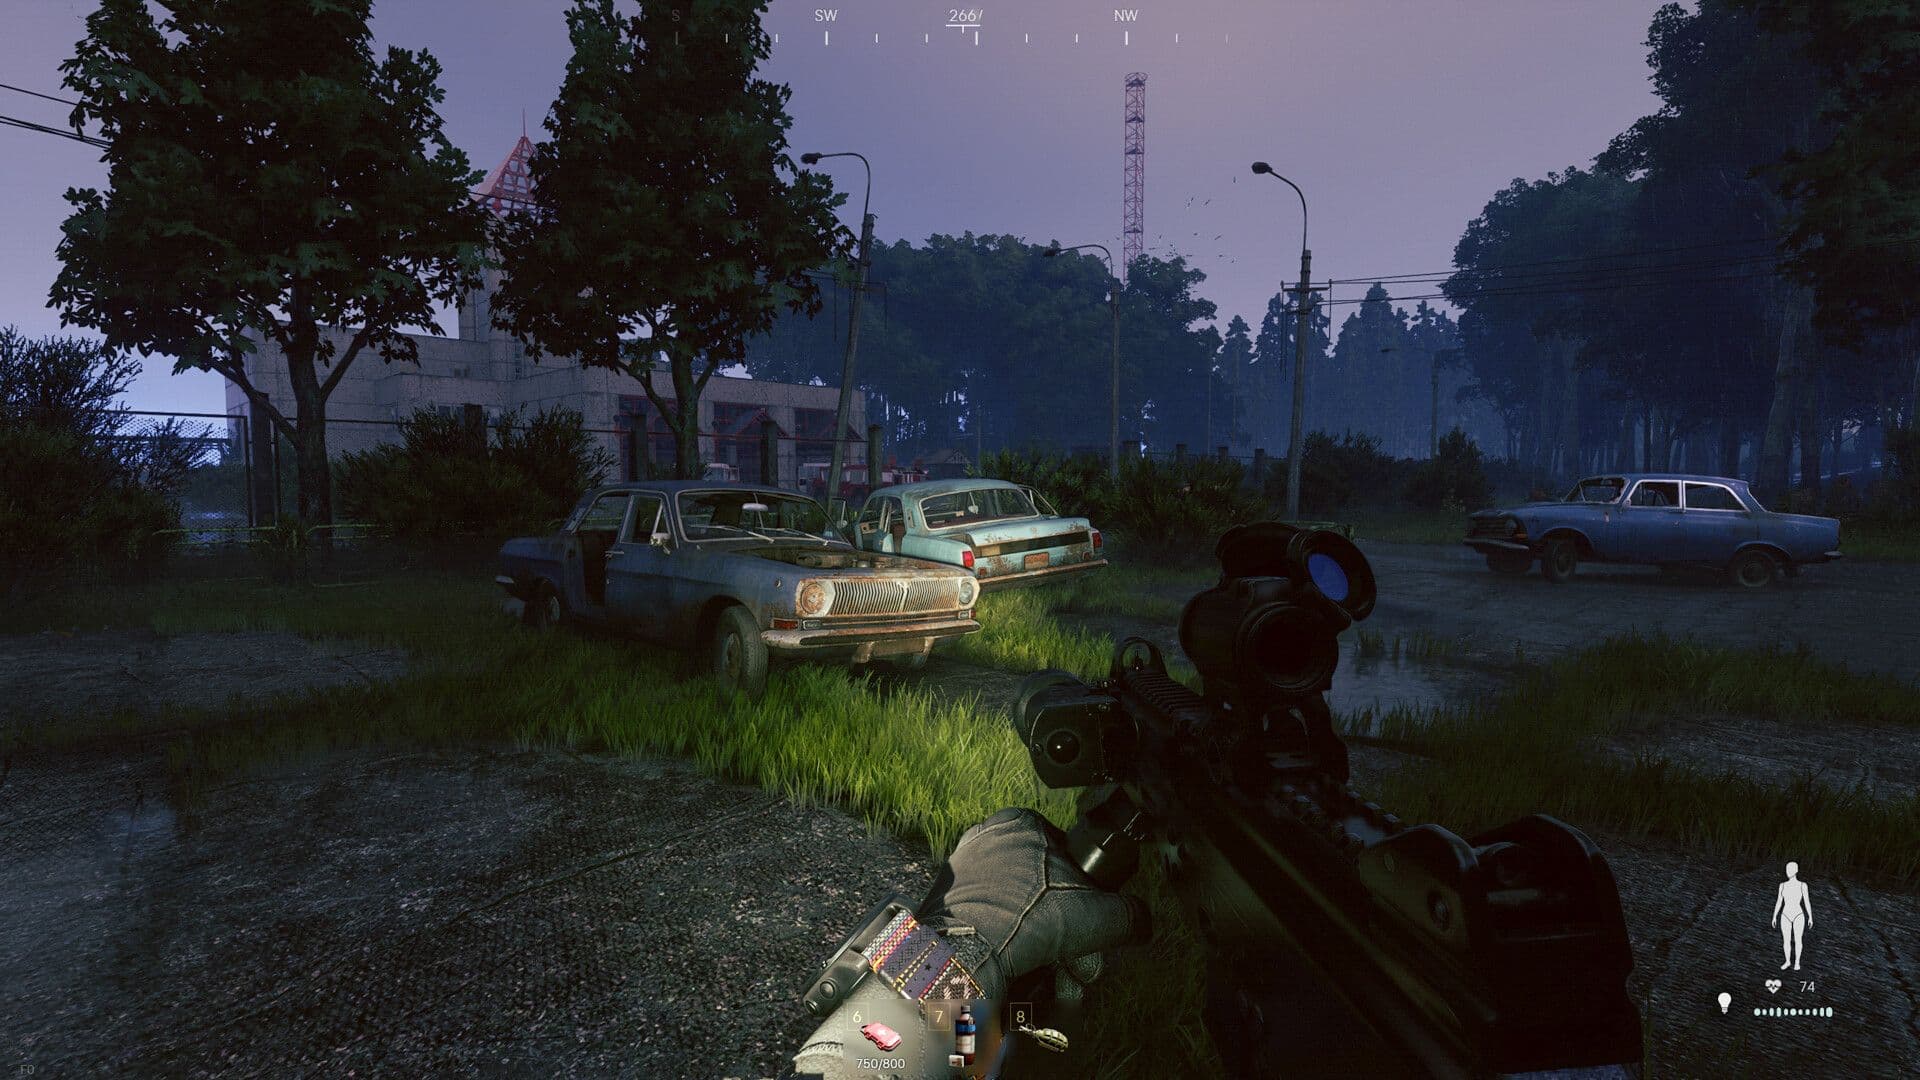
Active Matter is Gaijin's squad extraction shooter: you deploy into a zone with what you're wearing, fill your backpack, and get to an extraction point before you die or the timer runs out. Die and everything outside your safe container stays in the zone.
This guide is the whole day-one picture, written from the launch build (0.4.0.93, 15 September 2026) rather than the wiki. If you only have five minutes, the list below is the guide; everything after it is the why. What's changed since launch is in our Active Matter 1.0 launch recap.
Day one in five steps
- Buy a safe container with your starting Crystallised Active Matter, before anything else.
- Save a gear set so a death costs one click and a known number of Credits.
- Run Shegolskoe on Isolated until you can reach an extraction point without opening the map.
- Refine what you bring back rather than hoarding it; storage fills faster than you expect.
- Open the Monolith and read what Beta wants from you, because that's your first real goal.
The loop in one paragraph
Everything starts in your shelter, and each room is one of the systems below.
- Missions Terminal: pick a raid, choose Isolated or Open, set matchmaking, deploy.
- The zone: loot, do objectives, harvest Active Matter, extract.
- Refiner: turn what you don't need into Credits and chronotraces.
- Shop: replace the kit you burned.
- Monolith: turn progress into access to more of the game.
- Replicator: print the blueprints you've earned. Then deploy again.
Raid types: Isolated, Open, and the two you'll see later
Isolated vs Open
A raid isn't a separate map for PvE and PvP. Each entry on the Missions Terminal has an Isolated Raid (PvE) and an Open Raid toggle, and you pick one before you deploy.
- Isolated is you, your squad, the anomalies and the creatures. No other squads. This is where you learn a map's layout and extraction points without an operative watching you do it.
- Open adds other squads, and with them the two objective tiers the game locks away from Isolated: Qualified Field Work (Agent objectives) and High-Value Operations (Expert objectives) both show a padlock when Isolated is selected. Better loot, more risk, more of the game.
- A few raids are Open-only; the list shows a crossed-swords icon without the leaf.
Hired Ops and Faction Battles
Below the raid list are two more groups. Hired Ops are four arenas (Itzal Kutan, Mir Factory, Underground Depot, Vanilla Business Center) in Clash and Assault modes, which is the team-PvP queue the wikis still call "Nexus". Faction Battles are three Assault entries grouped by region. Neither is where a new player should spend day one.
Matchmaking and Auto-fill
Matchmaking mode sits above the deploy button, and the game's own tooltip is the clearest explanation of it:
"Choose which matchmaking mode to use: Solo, Squad, or Any. Selecting only solo or only squads will match you against the same type, but may increase matchmaking time."
Next to it is Auto-fill squad. Leave it on and matchmaking fills your empty seats with strangers; turn it off if you're waiting for a friend or a pro to join.

The maps, and the order you get them
Three regions
Named in-game after their incidents:
- Dalniy Catastrophe (the Soviet island): Shegolskoe, Factory, Park, Ozernoe, Scrapyard, Gigastructure, Cargo Port, Military Base, Dogorsk, Escape from Dogorsk.
- Saltriver City Incident (the North American city): Downtown, in three forms.
- Anguka Anga Quarantine (Africa): Headquarters and Airport.
Rotation and modifiers
That's about 20 base locations, and the list you see at any moment is a rotation of them with modifiers attached: Shegolskoe: Distortion, Cargo Port: Darkness, Scrapyard: Midnight, Military Base: Silent Observers, Downtown: Collapse, and Unstable Zone variants of several. The suffix changes what the raid is, so read it, not just the name.
Every entry carries a timer, the whole list rotates on a countdown shown at the top ("Next raids rotation in"), and two or three are always benched under "Temporarily unavailable". If the map you want isn't up, it will be.
Two numbers to read before you deploy
- Successful Raids is the game's overall extraction rate for that raid right now. On launch day we saw Military Base: Silent Observers at 90% and Factory at 37%, which is the difference between a map to learn on and a map to avoid.
- Personal Successful Raids is yours.
Weather and time of day are shown before you deploy too, and extraction points are marked with a green running figure, so you can plan the exit before you've seen the entrance.
Unlock order
You don't get every map on day one. Raid access is granted by the Monolith (below): Alpha hands you Shegolskoe, and the next tier's requirements assume you've extracted from Factory and Airport, so those open early. Learn one map's extraction points before you move on.
Your body: six health pools and where the plates go
Six health pools
Health isn't one bar. It's six: Head 100, Torso 220, each hand 130, each leg 165, and each part takes damage on its own.
Armour plates slot onto parts, in sizes S, L and XL, and which parts have slots at all depends on the Body Sleeve you're wearing. Plates have their own hit points (a fresh torso plate reads 340/340) and sit in your stash as consumables: you buy them, they absorb, you replace them.
A sleeve is not a skin
Camouflage and headgear are cosmetic and live in a separate Appearance panel. The sleeve underneath sets your plate layout, your base inventory volume and a set of passive modifiers.
The Deluxe Edition's Reaper, for example, is 500 volume with a Large torso slot and Small on both hands and both legs, +25% reload and healing-item speed, +50% melee strength and 10 seconds off shock time. We've read every sleeve on the launch build in our Body Sleeves guide. The short version: a starting sleeve is fine for Isolated raids, and the plate layout matters more than the percentages.
What you lose when you die, and how to lose less
The safe container
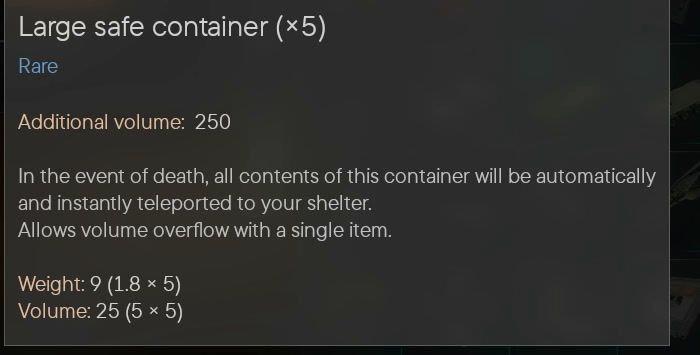
If you die in a raid, everything you carried in and everything you picked up stays in the zone, with one exception. The safe container is a slot of its own, separate from the backpack, and the game's description is exact:
"In the event of death, all contents of this container will be automatically and instantly teleported to your shelter. Allows volume overflow with a single item."
That last line is the rule nobody documents: the container has a volume, but one item can exceed it, so a single big find fits even when it shouldn't.
Three sizes, all bought with Crystallised Active Matter on the Shop's Special tab:
- Small: 75 volume, Ȼ50
- Medium: 150 volume, Ȼ100
- Large: 250 volume, Ȼ200
A Standard Edition account starts with 300 CAM. A Large container and a Beacon (Ȼ50) leaves 50 spare; a Medium, a Beacon and 10,000 Credits (Ȼ100) leaves the same. Either way the container is the first purchase, because it's the only thing that turns a bad raid from "lost everything" into "lost an hour".
Gear sets: what a life costs
Save a loadout in the Inventory, and after a death one hover shows "Buy missing items" with a price. On our test account a Vepr kit's missing pieces came to ₳4,840 with the rifle already owned:
- Combat Knife ₳350
- A 600-volume load vest ₳500
- An 800-volume backpack ₳800
- One ₳2,400 consumable, plus mags and 60 rounds
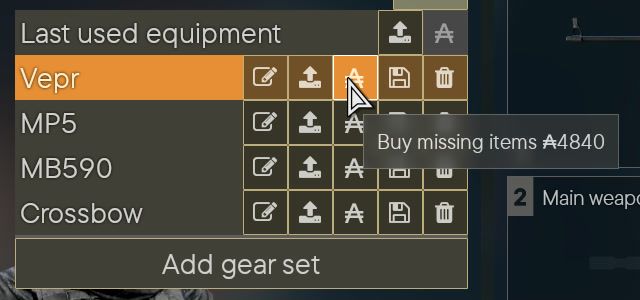
That is what a life costs in the starter tier, and it's the number to keep in your head when deciding whether to push one more building.
Or skip that number altogether while you learn: pick Rented equipment at the Loadout check and you deploy in borrowed kit. Die and you lose nothing of your own; extract and you keep what you found.
Chronogene charges
Tier III chronogenes carry charges, up to ten, and each death burns one. More on chronogenes below.
Day-one loadout and what it costs
Launch-build prices
From the Shop, in Credits (₳):
- Starter tier: Combat Knife 350, M9 1,270, M45A1 1,900, MB590 shotgun 2,700, MP5 3,350, UMP45 4,180, SOK 94 VLPR 5,200, SPAS-12 5,400, M24 8,100.
- Locked behind Monolith nodes, price still shown: MAC-11 14,935, DP-12 18,200, RSh-12 21,500, Scorpion EVO 3 23,835, XV ACP 37,975, M110A1 54,390, AA-12 61,000.
What Alpha's ₳10,000 buys
The Monolith's first tier grants ₳10,000. That buys an MP5 (3,350), an M9 (1,270) and a knife (350) with about ₳5,000 left for plates, ammo and meds, which is a complete Isolated-raid kit.
The 250 Shades of Liberty guns sit at five to twenty times the starter prices and behind nodes you can't buy yet, so "should I save for the DP-12" answers itself for the first week.
Volume, and the tooltip that tells you what things are worth
Every item card shows Rarity, Type, Volume and Weight, and volume is the stat that runs out first: your rig, backpack and container are all volume budgets, and the sleeve modifies how much space ammo, medicine and grenades take.
Hover any item in your stash and the tooltip also shows its Expected refine result, so you always know what the Refiner would pay for it before you decide whether to carry it.
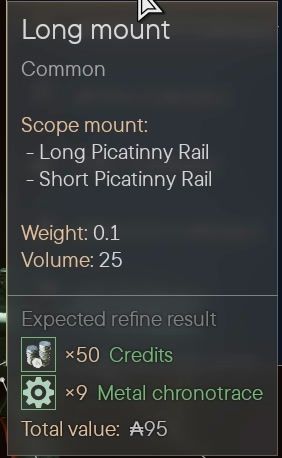
Weapons take mods in a dedicated modding view: stocks, grips, mounts, optics, suppressors and muzzle devices, each with its own weight, volume and effect. Attachments can be Monolith-locked too, so a rifle's full build is a mid-term project, not a day-one one.
The currencies, briefly
Four wallet icons in the top bar, left to right:
- Credits: the everyday currency and the Refiner's main output.
- Monolith Tokens: buy Monolith nodes.
- Crystallised Active Matter (CAM): the one-time-grant currency that also converts. On the Special tab, Ȼ100 buys ₳10,000 Credits and Ȼ500 buys 5,000 Monolith Tokens, so 1 CAM is 100 Credits or 10 Tokens.
- Merits: arrive from the Monolith's second tier and, as far as we can tell, belong to Faction Battles.
Chronotraces are not a fifth wallet. They're a family of components with their own storage (cap 50,000 on our account) and their own types; the Refiner paid out "Metal chronotrace" and "Energy chronotrace" by name. They feed the Replicator. Our currencies guide has every way each one is earned and what resets.
The Monolith: twelve levels you can't buy your way up
How a level is laid out
The Monolith has twelve access levels, named with Greek letters: α β γ δ ε ζ η θ ι κ λ μ. Each level has an Access upgrade gate and, behind it, four groups of nodes bought with Monolith Tokens:
- Immediate access: granted the moment you unlock the level.
- Replicator recipes.
- Cases unlocks: the Investigations cases.
- Shop unlocks: labelled "Unlock & Replication", because one purchase puts the item in the shop and hands you its blueprint.
What Alpha and Beta give you
Alpha grants ₳10,000 Credits, raid access to Shegolskoe and an initial 30,000 volume of storage. Beta grants 100 Merits and unlocks eleven cases, including the Dalniy story case "Park: Where It All Began" and two Agency cases tied to Tier II chronogenes.
The gates are extractions
The part that matters: the access gates are requirements, not prices.
Beta asks for Alpha, a tokens-spent threshold, and one successful raid as an operative on each of Shegolskoe, Factory and Airport, where "successful" means you extracted.
The ladder makes you get out alive from named maps, one of them in a different region, before it opens the next tier. Nothing in the Shop or the CAM exchange skips that. You don't have to buy every node on a level to move up; climb for the access and come back for the nodes you want.
Objectives and Cases
Objectives
Two objective systems run at once.
- Primary Objectives reset daily (the terminal shows "New objectives in" with a countdown): Active Matter Collection 0/10, Priority Raid, Baseline Compliance 0/8, and the two Open-only tiers.
- Operative Objectives are a rotating set of five per raid, tagged Agent or Expert: Combat Practice: Invisible, Soil Samples, Vehicle Transfer, Specimen Capture: Hellhound and the like.
Both pay Credits and Tokens.
Cases
Cases are the story spine and live in the Investigations Terminal. You can run three at a time. Each is a chain of tasks tied to specific raids ("Place and protect the sensor in the Park raid or its variants", "Eliminate Distorted with bolt action rifles in the Dogorsk raid") with a reward strip of blueprints, items and Tokens, and a paragraph of Agency briefing that is better written than it needed to be.
The terminal filters cases by the raid you're about to deploy to, so check it before every deploy and take the ones you can progress.
The Workshop: Refiner and Replicator
Refiner
The Refiner breaks items down. Queue what you extracted, and the "Expected result" panel shows the payout before you commit: Credits, Active Matter units and typed chronotraces.
Press Start refining and it pays out immediately; anything left queued is processed automatically when your next raid starts. Since the 12 September patch the payout scales with an item's market value, not its size, so a rare rifle you can't use yet is worth far more dismantled than a backpack of scrap. It's also your stash valve: storage starts at 30,000 volume and fills faster than you expect.
Replicator
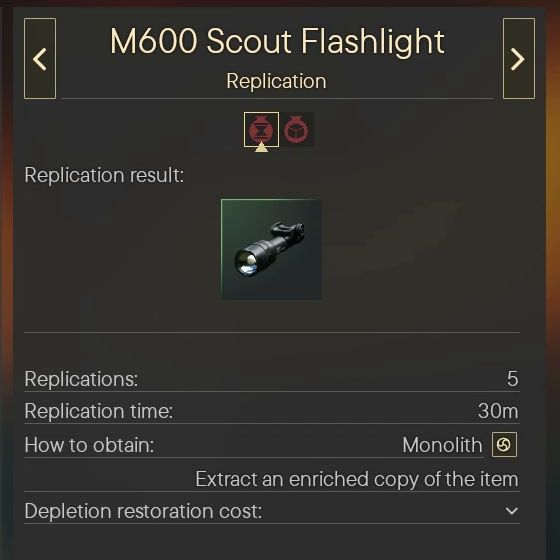
The Replicator prints blueprints. Each blueprint has a limited number of replications (an M600 flashlight blueprint showed 5), each run takes time in a module (30 minutes for that one), and blueprints come from Monolith nodes or from extracting an enriched copy of the item.
Enriched items are the ones that came out of the zone changed; carry them home, and the Replicator learns them. Module slots are limited early on, with the rest locked, so expect to run one or two jobs at a time.
Chronogenes and the Perks Tree
Slots and tiers
Chronogenes are your passive perks: four slots on the operative, each holding one at Tier I, II or III. Melee, Fine Motor Skills, Heal Efficiency, Overflow Healing, Active Matter Gathering, Breath Control, Cold-blooded, Endurance, Jump, Pain Shock, Speed, Steady Hand and more.
New ones come from the Replicator, not the Perks Tree, whatever the shared names suggest: recipes that fuse creature remains into chronogenes, and a Tier III Random Chronogene Synthesis that turns 20 Active Matter and three Tier II chronogenes into a random Tier III. The Perks Tree of current Personal Timeline (Profile, then Personnel Archive) is a separate system: small permanent passives you pick as your operative levels up, such as Melee I at +5% melee strength, listed as Passive Effects under your four slots. The tree belongs to the current personal timeline, and the game runs in cycles (the top bar read "Cycle 2 in 14h" on the launch build). Our Refiner, Replicator and Chronogenes guide covers both in full.
Where it adds up
The Characteristics and Skill screen is where sleeve modifiers, slotted chronogenes and tree passives stack into one "Modified Stats" list. On our Reaper, the sleeve's +50% melee strength became +77.7% with Melee II slotted, and healing-item speed went from +25% to +37.9%. Check it after every change, because that's the number the game actually uses.
What's in the zone
The pre-deploy map has a strip of icons along the bottom showing what's in that raid, and the case and objective names tell you the roster: Turned Soldiers, Distorted, Invisible, Hellhounds and Flowermen. Anomalies bend light and physics and are visible at a distance. Every creature and anomaly, and how to deal with it, is in our Active Matter monsters guide.
Treat every anomaly as a route problem, not a fight, and treat everything that moves in an Open raid as a squad until proven otherwise.
Extraction
Extraction points are the green running figure on the pre-deploy map, and every raid has a timer. Isolated raids are where you learn that the extraction is on the far side of the zone from where you spawned, and that the last five minutes are where most people die.
Rules of thumb that hold on every map:
- Know two extraction points before you deploy.
- Put your best find in the safe container the moment you pick it up.
- Leave early rather than full.
Squads are three, and the third seat is the hard part
Active Matter is built around squads of three operatives. Solo is possible in the matchmaking settings, and Open raids will teach you quickly why it isn't recommended. On launch day the hard part isn't the game, it's having two people online when you are who already know where the extraction is.
That's what our Squad Carry is: one of our pros joins your squad on their own account for the hours you book, from one hour up, runs the map with you (Isolated or Open, your call), and the loot you extract is yours. Nobody logs into your account. Active Matter has no trading and Gaijin's terms don't allow account sharing, so playing alongside you is the only version of this we'd sell.
Before the session, set Auto-fill squad off so matchmaking doesn't hand your third seat to a stranger. Console players can squad with a PC pro in Isolated raids; for Open raids, say you're on console in your ticket and we'll confirm the cross-platform setting before the clock starts.
Settings and editions
Two things worth doing before your first raid: turn motion blur and film grain off, and on an RTX card install driver 616.92 or newer. Our graphics guide has a settings pass for each hardware tier.
On editions, Standard (US$29.99) is the whole game; the higher editions buy storage, a starting arsenal and, for Elite Squad, two extra keys. Our editions comparison covers what each one skips.
Day-one questions
Is there a wipe? The game runs in cycles, and the Perks Tree is tied to your "current personal timeline". What carries across a reset and what doesn't is the subject of our currencies guide; Crystallised Active Matter is the one designed to survive.
Can I play solo? Yes. Matchmaking has a Solo-only mode that matches you against other solos, at the cost of longer queues. Isolated raids solo are a fine way to learn a map.
Is there cross-play? Isolated raids support squads across PC and console; Open raids ask both sides to opt in to cross-platform matchmaking.
Does early-version progress carry over? If you bought the early version on the Gaijin Store, the same edition unlocks on Steam for free and your progress comes with it, until 23 November 2026. Console players start fresh.
Can I pay someone to clear a raid or level my operative? Yes, and it's the same trade-off as the third seat. A raid clear is one raid on any map or variation you already have access to, run through and extracted on your account: self-play, where our pro joins your squad, or piloted, where we log in and run it. An Account Level Boost is piloted only and stops at 20. Piloted means account sharing, which Gaijin's terms prohibit, so we tell you the risk before you pay; self-play carries none of it. Our boosting guide covers all three and which one you actually want.
What should I do in the first hour? Buy the safe container. Set a gear set. Run Shegolskoe on Isolated, in Rented equipment if you like, until you can find an extraction point without the map. Refine what you bring back. Then look at the Monolith and see what Beta wants from you.
Is it worth it? At US$29.99 with nothing gated behind a higher edition, the question is only whether you want a squad extraction shooter with this much system under it. If you do, buy Standard and spend the CAM on the container. If you're not sure, Steam's refund window covers the first two hours, and two hours is about how long it takes to know.